> For the complete documentation index, see [llms.txt](https://tooltips.gitbook.io/tooltips/llms.txt). Markdown versions of documentation pages are available by appending `.md` to page URLs; this page is available as [Markdown](https://tooltips.gitbook.io/tooltips/configuration/theme/theme-textures.md).

# Theme textures

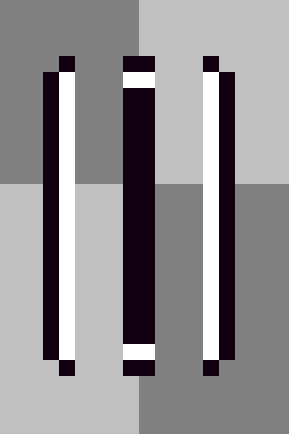
Themes are used to define **how** a tooltip looks. They're an essential building component and as such are required for everything else to work. It all starts with the themes texture, which looks like this:

<div align="left"><figure><img src="https://2056457066-files.gitbook.io/~/files/v0/b/gitbook-x-prod.appspot.com/o/spaces%2FO0fJVi4OrBJoOYrP9n9t%2Fuploads%2FUP8qGAYGnpgMcwCf06dA%2Fimage.png?alt=media&amp;token=6dd611ef-2236-4a13-9860-89d223bab271" alt="" width="237"><figcaption><p>Aseprite -software is recommended when working with textures</p></figcaption></figure></div>

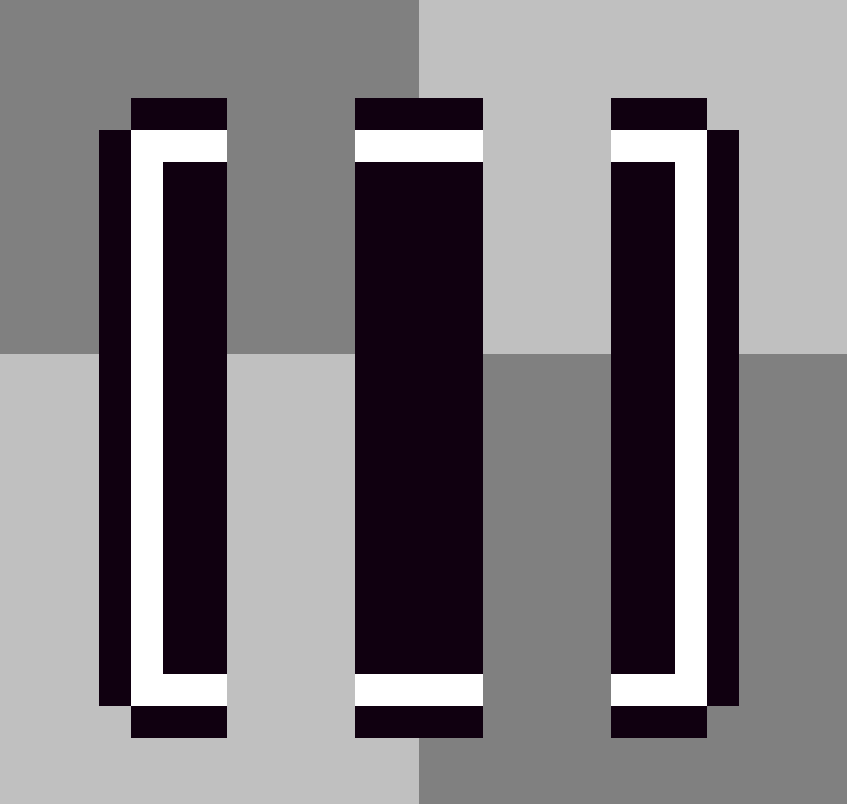
Tooltips consist of three parts; left, center and right. You can see all of them in the texture example above. The width of the texture is 6 pixels, which when divided by 3 (for all three parts) equates to 2 pixels per part. So the main rule when making custom themes, is to make their **size divisible by three**.

<div align="left"><figure><img src="https://2056457066-files.gitbook.io/~/files/v0/b/gitbook-x-prod.appspot.com/o/spaces%2FO0fJVi4OrBJoOYrP9n9t%2Fuploads%2FGp8uW9I3KjyVSEntGoD0%2Fimage.png?alt=media&amp;token=a04bb35c-bca2-4ccb-b0f0-f49c8bd645e1" alt="" width="145"><figcaption><p>This is how the plugin will split the texture</p></figcaption></figure></div>

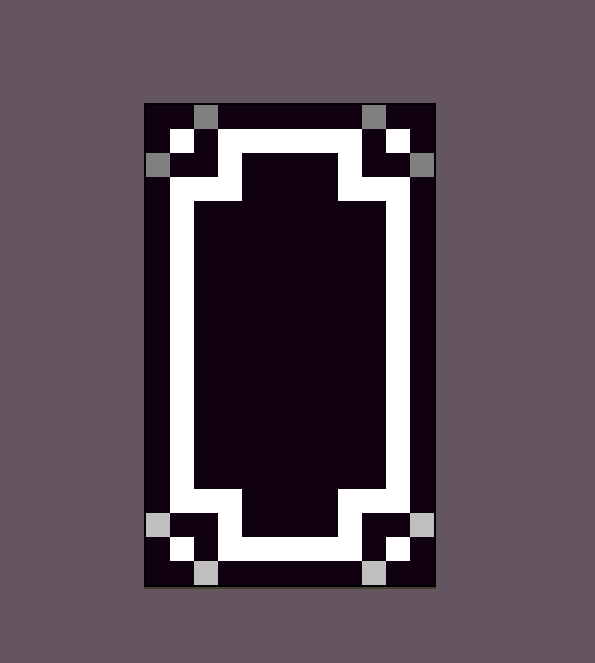
For example, it is possible to make a wider and more detailed tooltip by setting the width to 12, so we have 4 pixels to work with:

<div align="left"><figure><img src="https://2056457066-files.gitbook.io/~/files/v0/b/gitbook-x-prod.appspot.com/o/spaces%2FO0fJVi4OrBJoOYrP9n9t%2Fuploads%2FHl5DXmmqlK1p9aV0XeBl%2Fimage.png?alt=media&amp;token=dd5c3074-35da-458c-8b22-ac761838fc13" alt="" width="188"><figcaption></figcaption></figure></div>

With that much space, we can create more complex shapes for the borders. Here's an example:
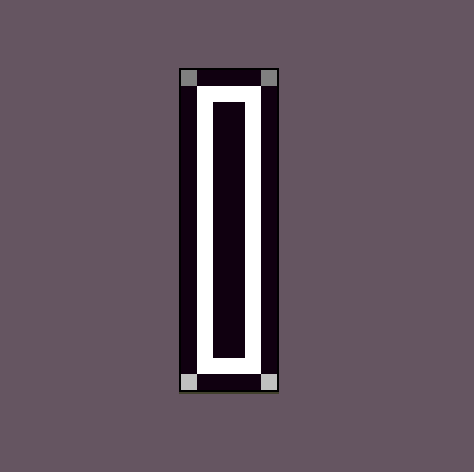
<div align="left"><figure><img src="https://2056457066-files.gitbook.io/~/files/v0/b/gitbook-x-prod.appspot.com/o/spaces%2FO0fJVi4OrBJoOYrP9n9t%2Fuploads%2FBJSmrkbRJ6VgK5ajb4zy%2Fimage.png?alt=media&amp;token=9417a6a9-9c3d-4be2-8488-80ceb2b52c96" alt="" width="149"><figcaption><p>Width: 12, height: 20</p></figcaption></figure></div>

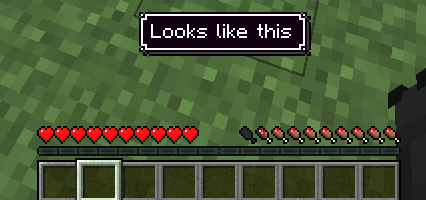
<div align="left"><figure><img src="https://2056457066-files.gitbook.io/~/files/v0/b/gitbook-x-prod.appspot.com/o/spaces%2FO0fJVi4OrBJoOYrP9n9t%2Fuploads%2F3uu9KwnctJNDAXNw6xzL%2Fimage.png?alt=media&amp;token=5b56b4ea-8d7f-457e-8274-0a43f3c37cbe" alt="" width="320"><figcaption></figcaption></figure></div>